
Arduino code:
#include <Keypad.h>
const byte ROWS = 4; //four rows
const byte COLS = 4; //four columns
char keys[ROWS][COLS] = {
{'7','8','9','/'},
{'4','5','6','*'},
{'1','2','3','-'},
{'c','0','=','+'}
};
byte rowPins[ROWS] = {2, 3, 4, 5}; //connect to the row pinouts of the keypad
byte colPins[COLS] = {6, 7, 8, 9}; //connect to the column pinouts of the keypad
Keypad keypad = Keypad( makeKeymap(keys), rowPins, colPins, ROWS, COLS );
void setup(){
Serial.begin(9600);
}
void loop()
{
char key = keypad.getKey();
if (key)
{
Serial.println(key);
}
if (key=='5')
{
Serial.println("hiii");
}
}
Embedded systems basics:
Embedded systems step by step video guide
-using PROTEUS ISIS professional and Arduino IDE software
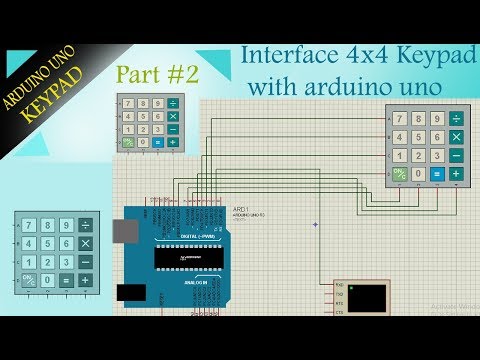
Click below link for interface Keypad with Arduino UNO
https://youtu.be/cnPb4pObkXc
Click below link for the gas sensor
https://youtu.be/ALm-okkKRPY
Click below link for PIR sensor
https://youtu.be/4gRo1ijpMmQ
Click below link for the temperature sensor
https://youtu.be/1GJC_6eF7Xg
Click below link for vibration sensor
https://youtu.be/jiJAhxa687s
Click below link for M shape led blinking
https://youtu.be/S46J4L4KOu4
Subscribe To My Channel and Get More Great Ideas
https://bit.ly/2UlZJcb
Click below link for more embedded topics
https://digiuniverselife.blogspot.in
Contact Us
https://bit.ly/2NAeebK
https://bit.ly/2x3R1p1
If you like this Video Please like and Share with your friends...
Basics of embedded systems -Digital Universe
Thanking you..


No comments:
Post a Comment